HOW TO
General Information
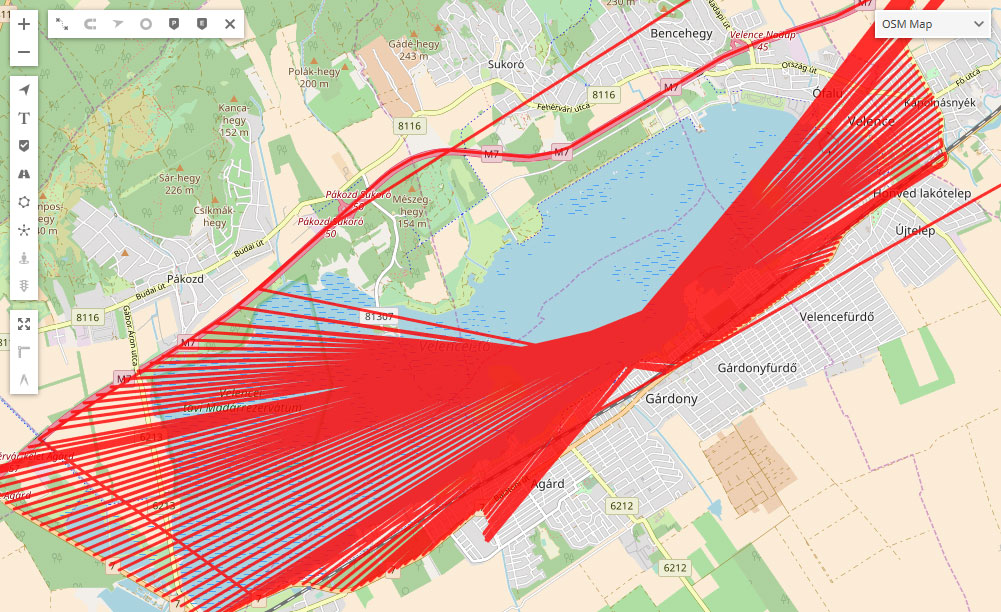
Travel route incorrectly displayed and looks like a mess of lines, how to solve this?
It might be caused by incorrect time zone settings.
All GPS devices must send data in 0 UTC timezone (except mobile devices using GPS Tracker application).
Set 0 UTC timezone on GPS device side (see GPS device manual).
Set 0 UTC timezone in GPS device accuracy settings.
Set correct timezone in User interface.
Clear object history.
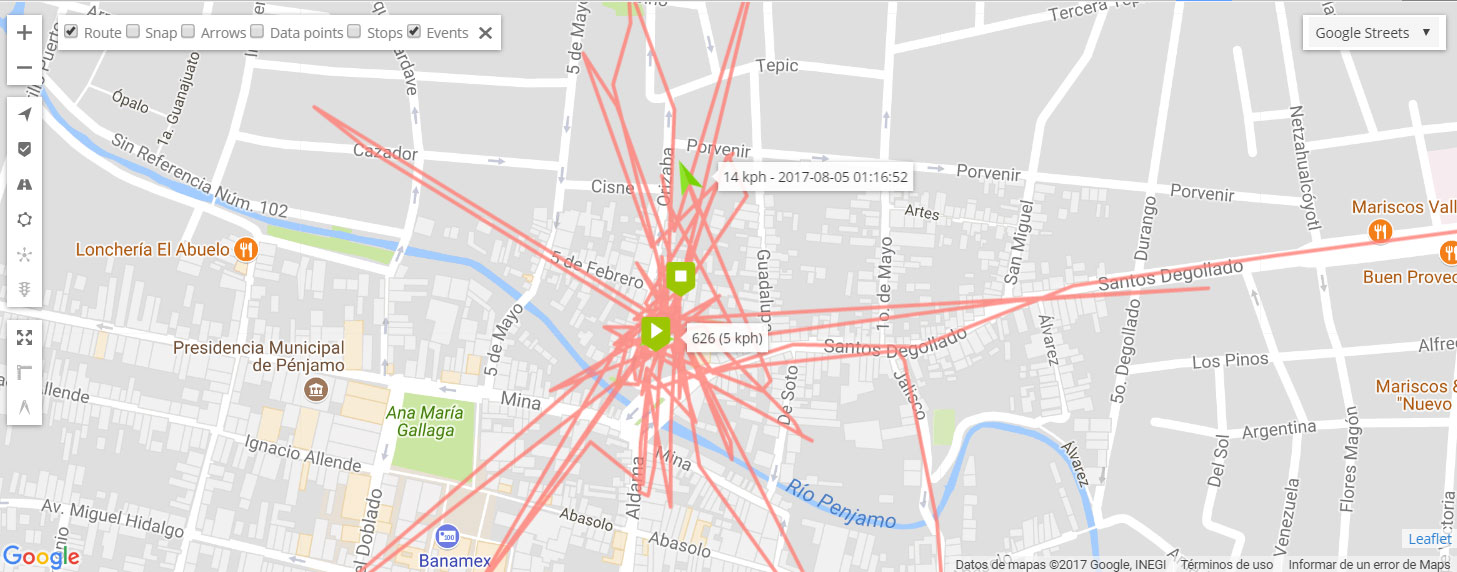
Why I see straight lines in the route?
Straight line means that in particular point device was offline. During offline period, coordinates were not saved, due to data loss, you will see straight line from point where signal was lost till next point were connection was established again.
Example:
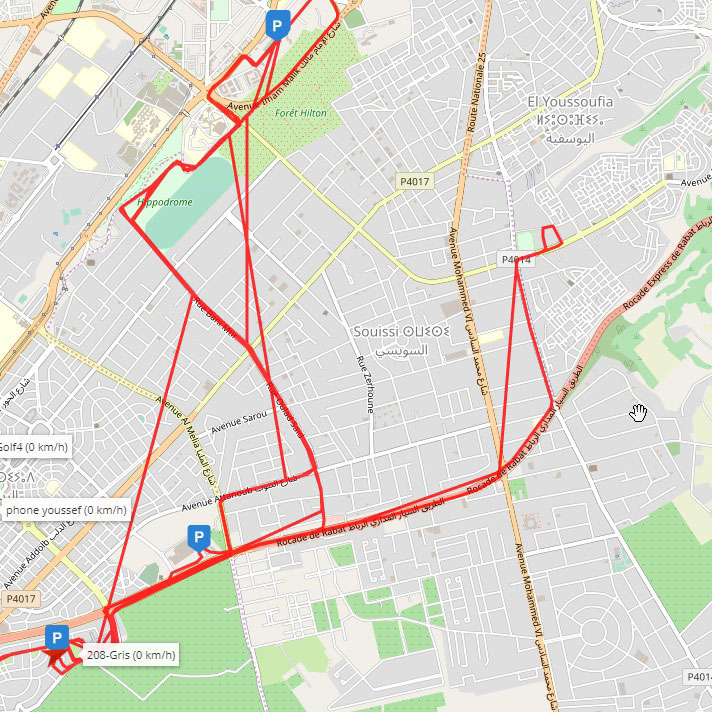
Sudden jumps appear in route, why it happens?
It is caused by weak GPS signal. Make sure that device GPS antenna has good reception.
Example of how those jumps might look:
How to configure Teltonika device?
Teltonika devices are feature rich and give very accurate route, but at first it might be a bit tricky to find proper configuration. Always study device manual and Teltonika Wiki page.
Configuration example in 3 main sections:
System

GPRS

Data acquisition

Getting incorrect fuel level readings
Problem
The fuel level provided in GPS-server software does not match the real fuel level in the tank.

Causes
This issue is caused by fuel movement in the tank. If in object setting “Detect stops using” is set to GPS when the object stops fuel can move by inertia inside the gas tank causing incorrect Fuel level readings which may cause wrong fuel level data.
Solution
To fix this issue you need in Object settings->Accuracy tab set "Detect stops using" to ACC. This will provide you more accurate fuel consumption data.
I am using Google API but can't see address in account
Google geocoding API must be enabled
Login to your Google Cloud Console account
Click the Select a project button, then select the same project you set up for the Maps JavaScript API and click Open.
From the list of APIs on the Dashboard, look for Geocoding API.
If you see the API in the list, you’re all set. If the API is not listed, enable it.
At the top of the page, select ENABLE API to display the Library tab. Alternatively, from the left side menu, select Library.
Search for Geocoding API, then select it from the results list.
Select ENABLE. When the process finishes, Geocoding API appears in the list of APIs on the Dashboard.
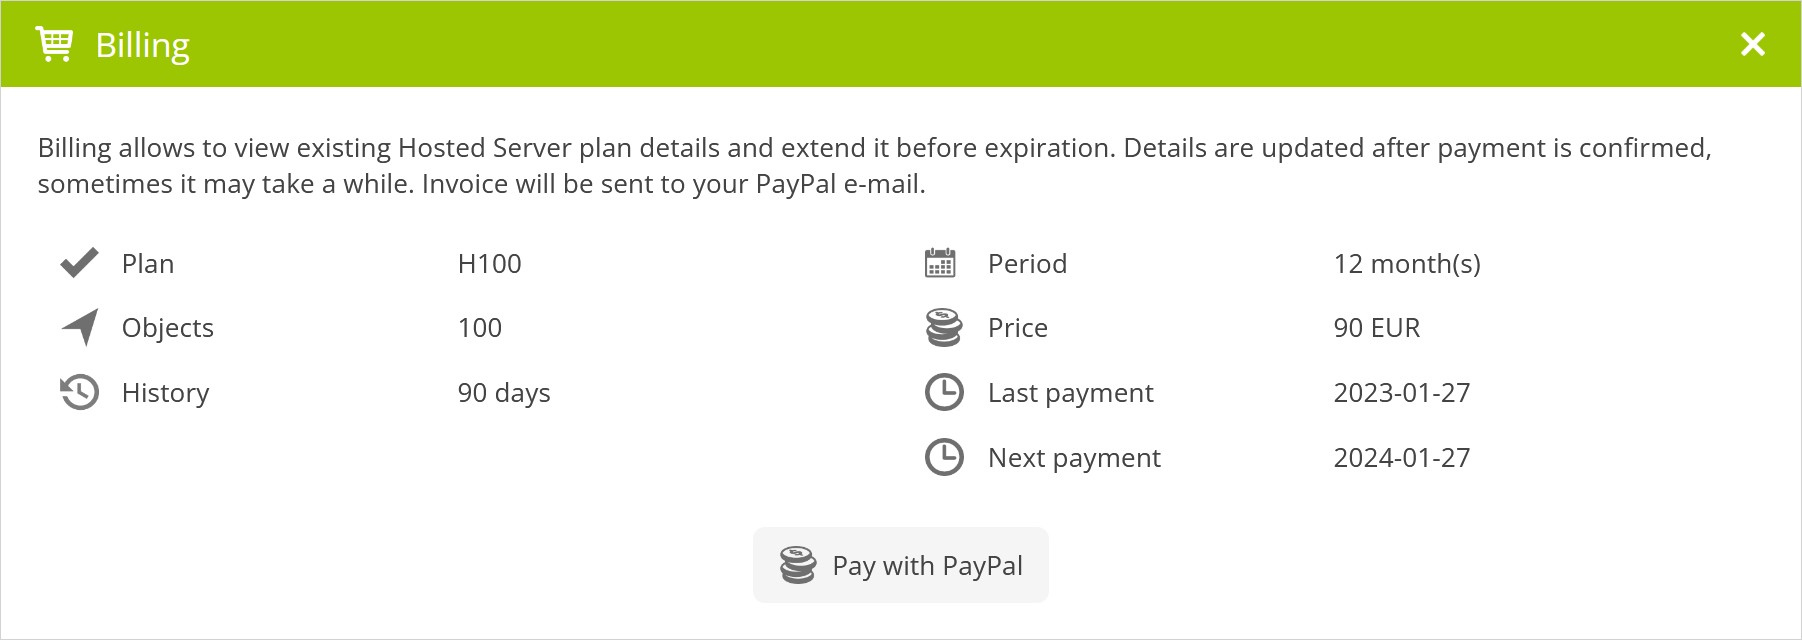
How to check what Hosted server plan I'm using and when the activation ends?
You can check which plan you are using and expiration date in Control panel by clicking on Billing button  .
.
The window with Hosted server information will appear.
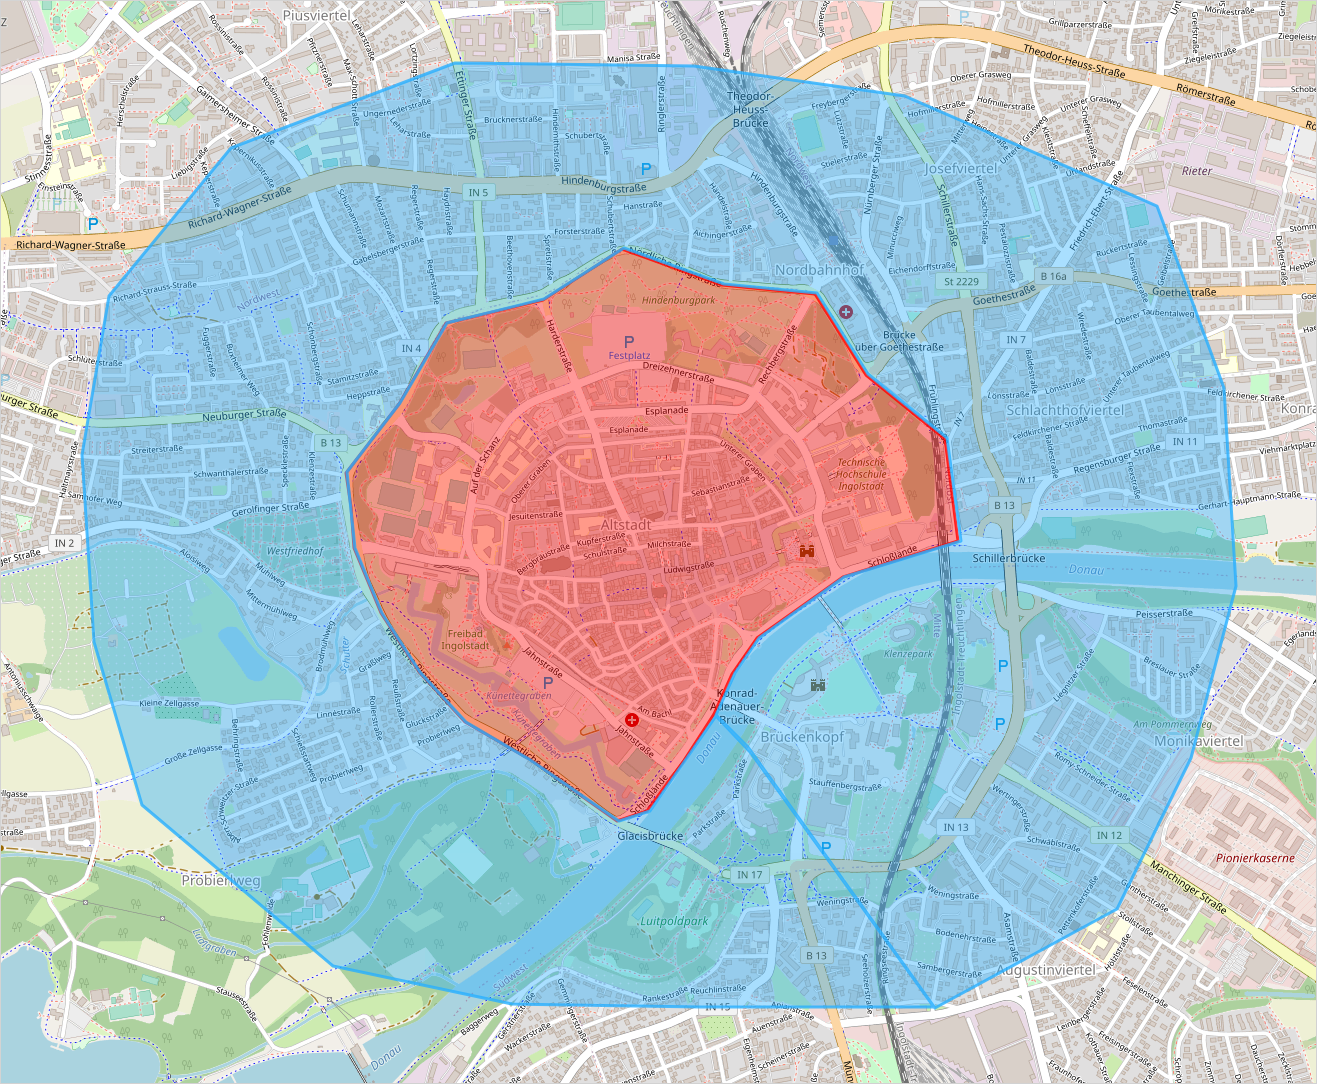
How to create Zone inside of the Zone
In scenarios where a zone is required within another zone, e.g. a city's zone must be within the region or country zone. A zone cannot be drawn over another zone, to achieve the desired result the region or country should be drawn around the city zone.
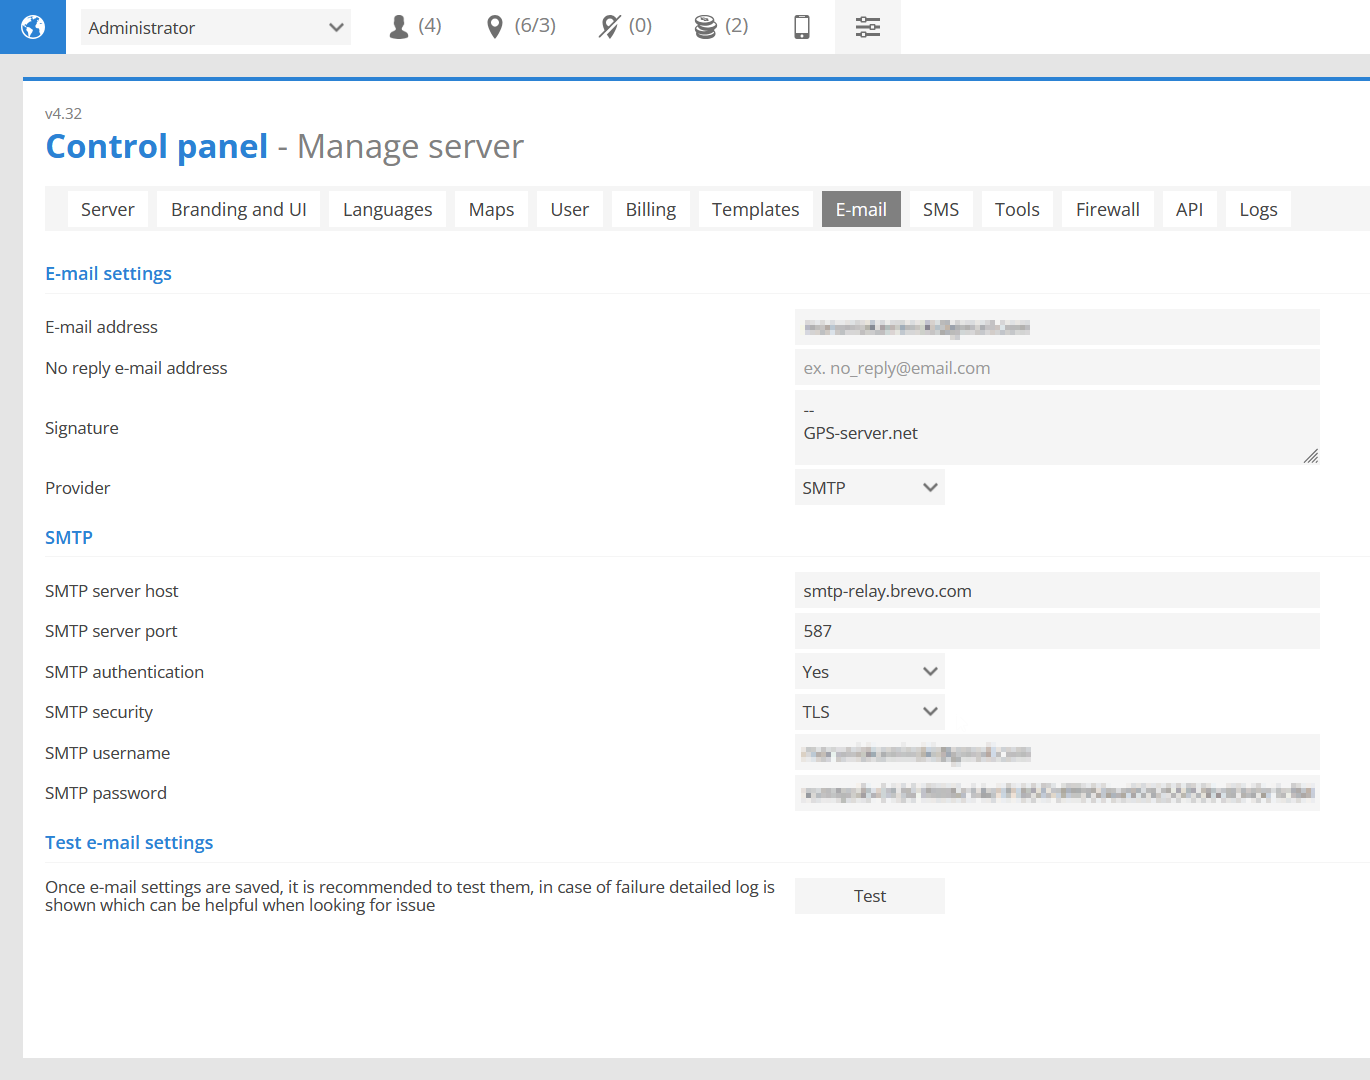
E-mail
Brevo setup
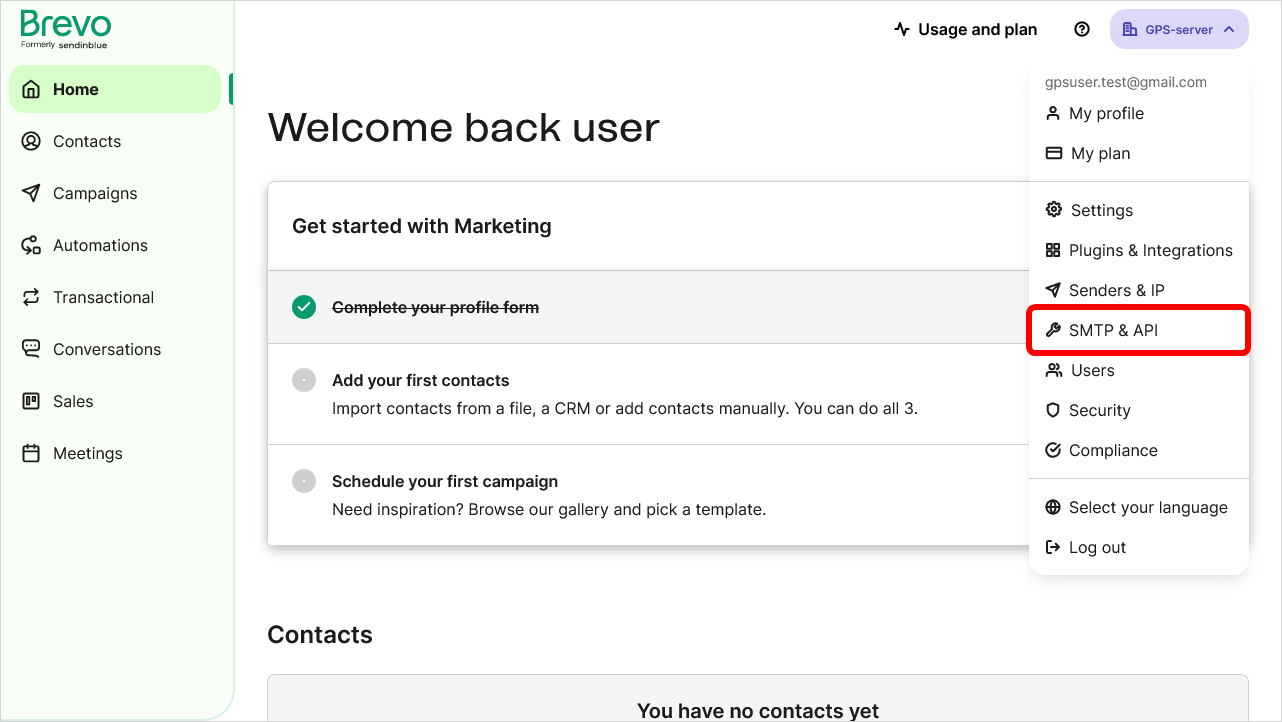
Page with SMTP credentials will open.
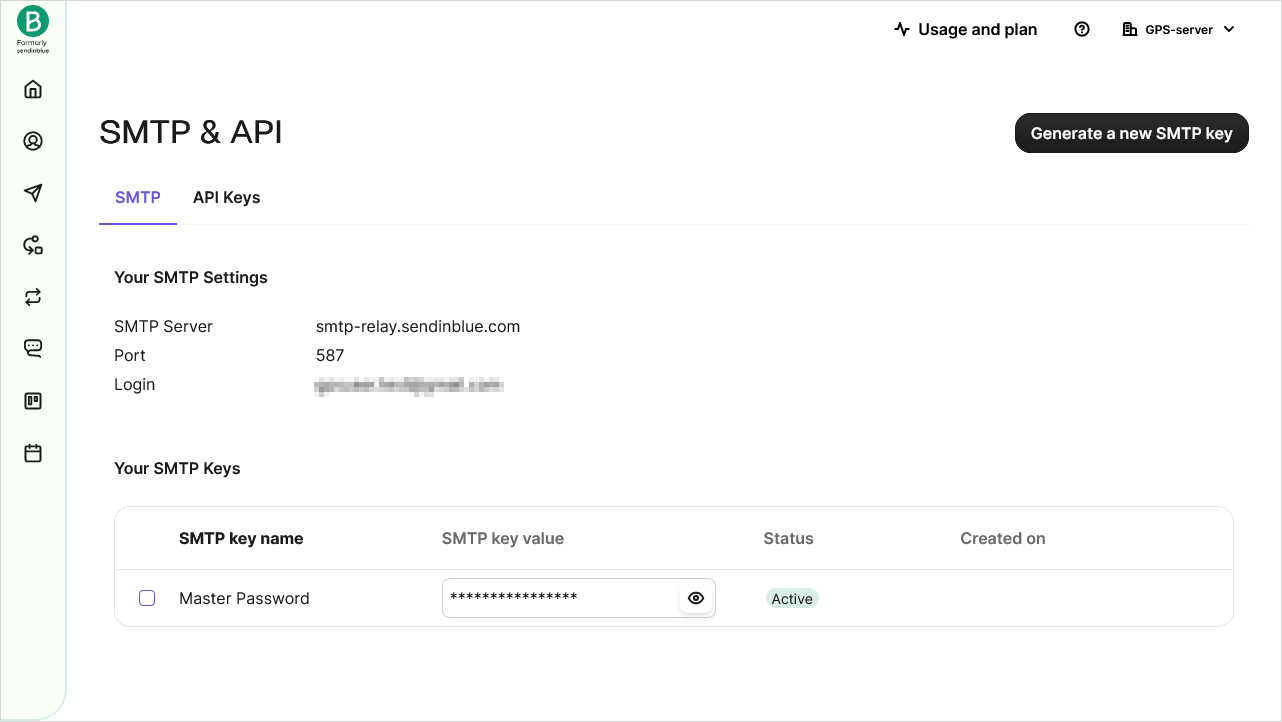
These credentials need to be copied in to Control Panel → Managed Server → E-mail tab